Wednesday, May 21, 2008

Tips & Techniques: Out of Town Guests

If you're anything like me, you'll have at least a few out-of-town guests on your list. My family lives all over the US, and my friends are getting spread out too... that means (I may be exaggerating but it feels like) half of our guests will be from a different state! That will unfortunately include my fiance, me and possibly even my parents, if they retire before I get married. Yes, crazy. But there is a way to make sure everything goes smoothly, no one feels awkward, and you don't feel insanely stressed by it all.

Make sure the out-of-town guests know what's going on.
If you were going to an unfamiliar city, you'd want to know what's happening with the event! And it's also useful to know what to do, where to go, and who to call. At a minimum, you should let your guests know the following:

*Dates, times, etc. of all the events they're invited to (shower, rehearsal dinner, etc.) and the expected formality
*Phone numbers of important wedding party and/or family members (and hotel info if they're staying in one)
*Phone numbers of the event venue(s)
*Address of the event venue(s) and directions from several important locations
*Whether you will provide transportation to/from the airport, the venue(s), hotels, etc.
*If you're not providing transportation, information about rental cars, taxis, or other services like public transit

It's also nice to book a chunk of tickets for a flight if you have a number of people coming from the same place and a number of rooms at two nearby hotels: one nicer and one more for the budget-minded. You don't have to pay for them (don't reserve it, but request they be held as a group) but you might be able to get a group discount. That way they'll also have others they know to lessen the stress of travel.

And don't forget to tell yourself what's going on! Make a sheet of when your guests will arrive and leave, where they'll stay (and the number of the hotel, along with the room number if you can get it), and what events they're coming to. If you're arranging any part of their transportation or entertainment, make a note of it as well. It'll save a lot of headaches!

Provide your guests with something to do outside of the wedding.
Don't let your travelers get bored! Although you will be busy for at least the week of your wedding, your guests might not have much to do. It's nice to invite your guests to the rehearsal dinner, but that's not always financially possible. Some families like to host an after-wedding brunch (the following day) or another get-together a different day, but this isn't always easy to do either. So what's a bride and her family to do with the guests needing entertainment? Tell the out-of-towners about the wonderful things to do in your city or town! Most places have plenty of things to do and see -- and will fit nearly any budget (think a trip to an in-town spa or a walk through a nearby park). Better yet, tell them about the things you love to do! Here are a few to get you started:

*Cultural attractions like museums, historical sites, aquariums, and symphony halls
*Sporting places like hiking trails, biking paths, lakes, and parks
*Shopping spots near the venue(s) or hotel(s)
*Interesting urban locations to explore
*Location-specific "places of interest"
*Kid-friendly spots if your guests are bringing children
*Fabulous (and/or reasonably priced!) restaurants near the hotel(s)

Make your travelers feel welcome.
At the least you want to make sure everyone from out of town feels welcomed to your wedding. A "welcome" packet, including the information you want them to know (even if you've put it on a website or sent it out previously) will ease some of the worries they might have about getting to your event. You can even do a bit of decorating -- maybe print the info on a page with your wedding colors or motif, or add a bit of ribbon.

For something a little more involved, you could make up a little "welcome basket" with the same information, plus a few goodies that reflect you, your wedding, or your location. Like favors, they don't have to be expensive and can really make the guest feel good to be there. Of course, you'll probably need to enlist a bit of help -- get your bridesmaids or other helpers to help distribute what you make to the hotel rooms to ease the stress of yet another detail to be worked out.

So what should you include? In addition to the phone numbers and other information, there are a number of things you can put in to treat your guests.

*Homemade goodies, like cookies or candies
*Fresh fruit or packaged snacks (especially good if they've had a long flight)
*A bottle of wine (or a couple bottles of water if they'll be walking around siteseeing!)
*Gift certificates to local services, like the hotel spa or a nearby theater
*Locally made items -- this is especially good if you're having a destination wedding
*One or two "tourist" style maps to help them find interesting extra stops
*A transit map and prepaid transit card (with a note of how many trips or days)
*A personal handwritten "thank you for coming" note

These can all be in a cute basket or another container that fits your theme (bucket for a nautical or beach theme, rhinestone-studded container for a fairytale wedding, etc.). Even a piece of ribbon in one or both of your colors can help tie everything together (literally or figuratively) and help you figure out what you'll do without creating a whole slew of extra decisions.

Make sure that everything you put in your "welcome" is take-home-able. Something too big might not fit in a small suitcase, for example, or overly fragile items could get broken. Like favors, the idea is to be kind, not overly extravagant. Do what works for you -- if that's just a sheet of paper with phone numbers and directions, it's fine! But don't ignore your out-of-town guests; they probably spent money to come see you, so try to show your appreciation however you can, and make them feel as warmly welcomed as possible.

Friday, May 9, 2008

Update

I've added a way to subscribe to this blog, so now you can tell immediately when I add new posts! The option is on the bottom right; click on "posts" under the "subscribe to" heading.

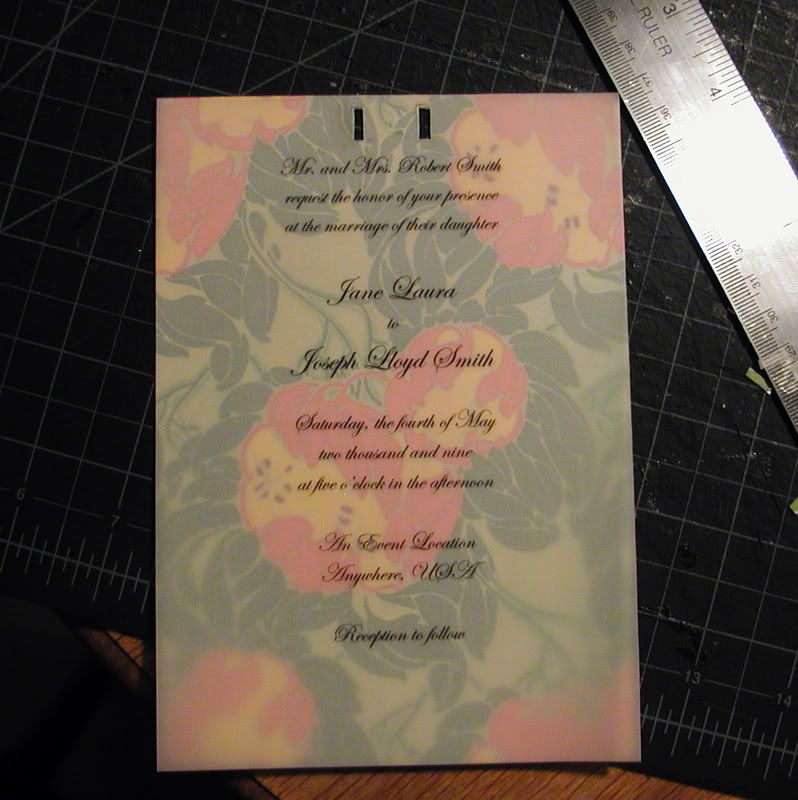
I've got so many ideas buzzing around in my head. I can't wait to get them out! The invitation below is just one of many I've already thought of. It makes me wonder what I'll actually do once I get to my own! But meanwhile, I'll have a few fun ideas for you :)

On the actual wedding front: my fiancé and I went to see what items we might want on our registry (early, yes, but it's nice to do it when there's no pressure). There are so many choices to be made -- it can really overwhelm you if you're not prepared. China patterns, flatware types, stemware, linens, appliances... it gets dizzying fast. If you're not registering right away (and just looking for things that catch your eye, like we were), take a notepad and write down brands and styles you like. It's almost impossible to remember names after hours of pattern-hunting. If you want, get someone from the store to help you match items you're trying to find. If you don't think you have a clue about design, they can probably help. Better yet, bring a fashion- or design-savvy friend with you (preferably one who's also friends with your fiancé[e])!

It's great to go to a store that carries a lot of registry-type items, like Macy's, because that way you can find a large chunk of what you want without having to visit a large number of stores. It can get tiring walking around so many stores, particularly if you've only set aside a few days for registry stuff. Plus those larger chains are all over the U.S., and even with easy online ordering, many people want to see for themselves what they'll be getting you.

Speaking of seeing things for yourself, it's also important that you look at registry items in person. Patterns, textures, and surfaces can look very different online versus in real life, and you don't want to end up with something you're not thrilled about. I wasn't prepared for this -- I found a china pattern I really liked online, but in the store it was only so-so. Disappointing -- and imagine how it would have been if I had ordered it! Don't make the mistake of falling in love with something before seeing it in real life.

Thursday, May 8, 2008

How-Tos: Simple Vellum Overlay Invitations

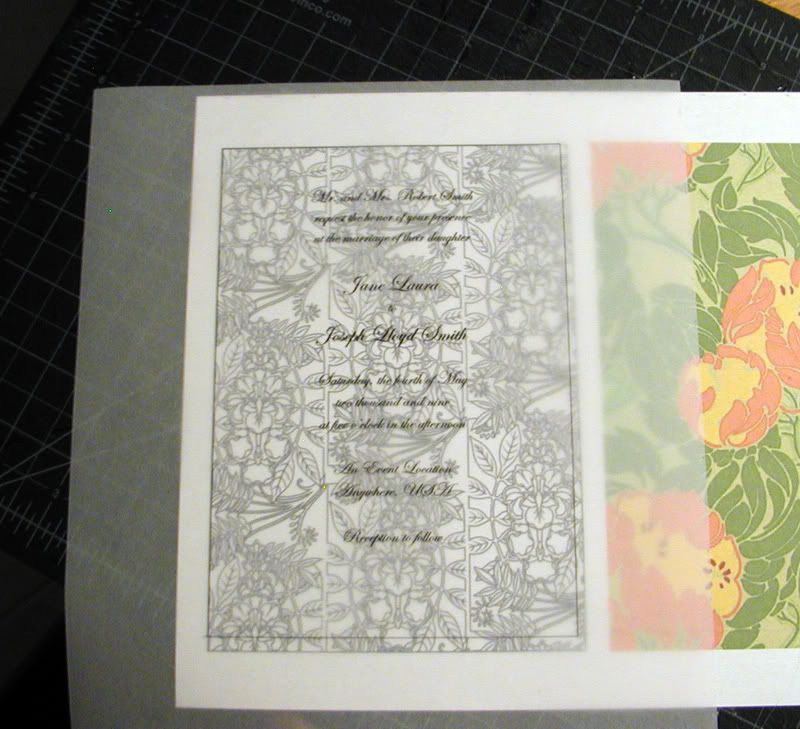
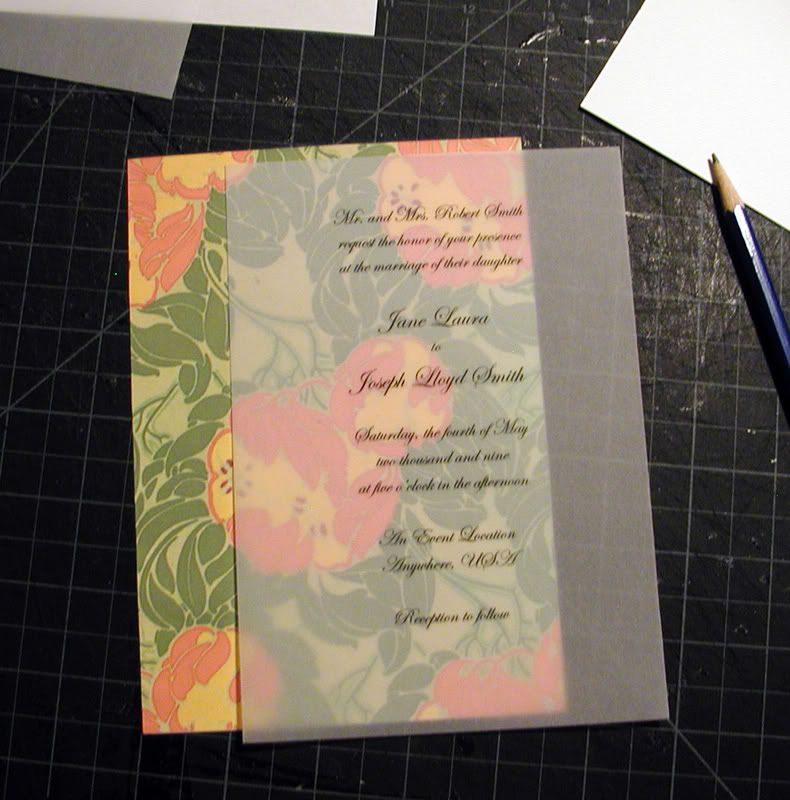
PhotobucketVellum overlays add a beautiful touch to invitations, from the more traditional to to the modern. Although it looks expensive, 8.5"x11" vellum can be bought at paper-supply stores relatively cheaply. Just make sure you get thin vellum that can be fed through your printer.


Items needed:
* Printed sheet of background graphic of your choice
* 8.5"x11" sheet of vellum
* Cardstock or thick paper
* Length of ribbon to match background graphic
* Scissors or craft knife and straightedge
* Gluestick and/or double-sided tape
* Word-processing or graphic creation software and printer

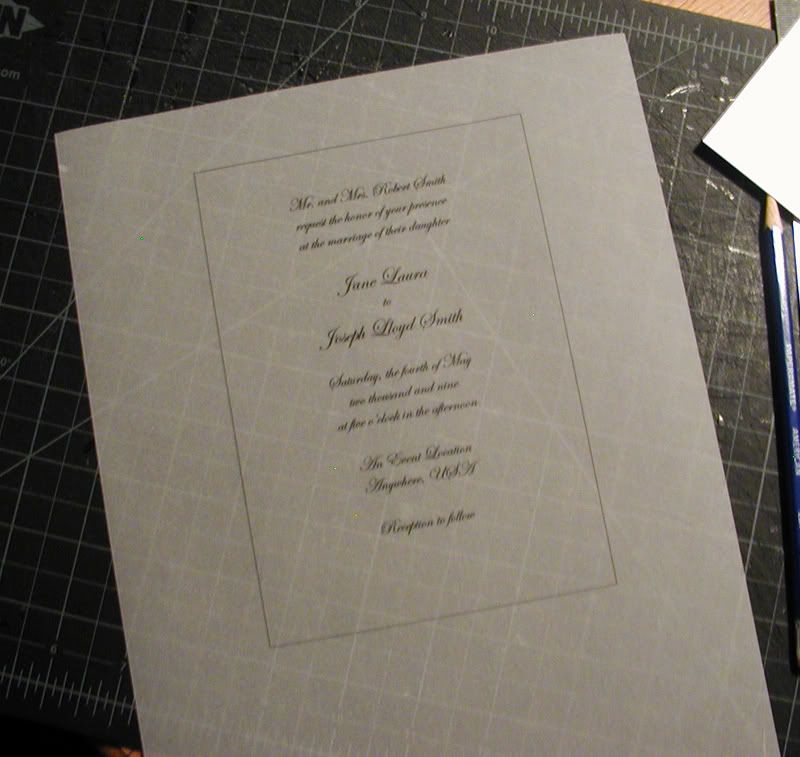
Photobucket1. Create your invitation wording on the word-processing software. If possible, save as an image so you can double up and print two per sheet of vellum. I created a box centered on the text so I knew where to trim the excess; it makes cutting the overlay easier. Print it carefully onto the vellum, one sheet at a time. Make sure you don't touch the ink so it has a chance to dry.

Photobucket2. If you're trying to decide between several different graphic backgrounds, check to see how each looks underneath the invitation wording. You want to be able to read the invitation while still being able to tell what the image is.


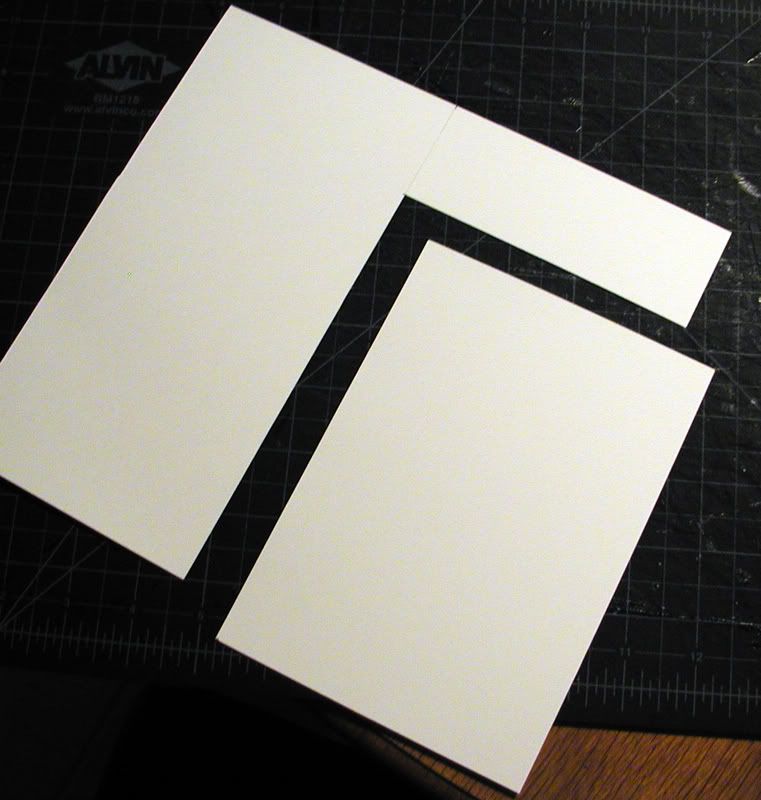
Photobucket3. Cut the cardstock or thick paper to your final invitation size. A good rule of thumb is about 5"x7", and it's better to trim it by about a quarter of an inch or so to ensure it fits into a standard-size envelope. If you want custom size invitations, remember that you'll have to find (or make) custom envelopes, and in some cases (like square invitations) you may need to pay extra postage.

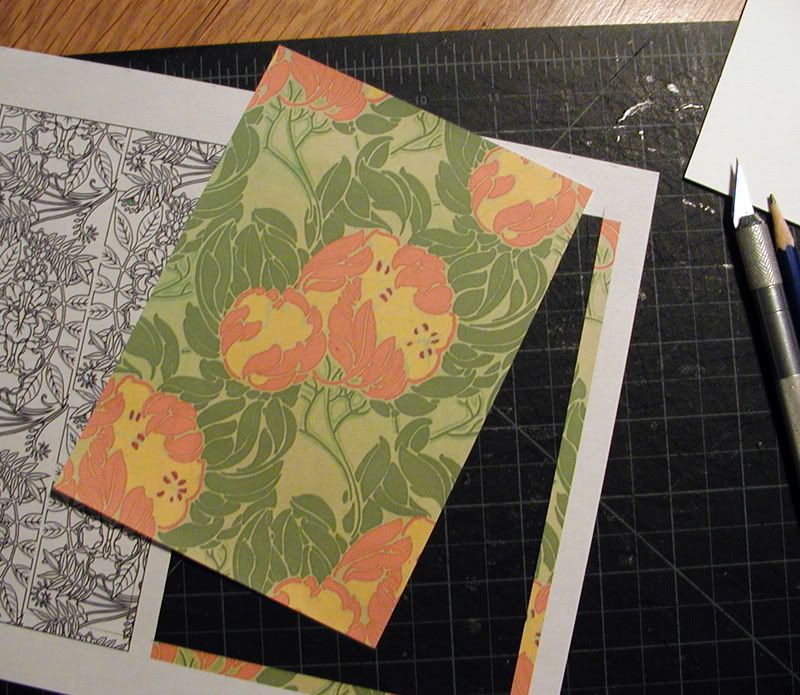
Photobucket4. Cut the background graphic. In the example I cut it to the same size as the cardstock; however, you may decide that you want to have the cardstock color showing with a smaller graphic.


Photobucket5. Cut the vellum to size. It's best if the vellum is the same size as the cardstock. Arrange the pieces until you find an eye-pleasing combination. Carefully attach the graphic to the cardstock with a gluestick or double-sided tape (regular white glue will warp the cardstock).


Photobucket6. Using a tiny dab of glue or a small piece of the double-sided tape on the top center - where the ribbon will be tied - place the vellum overlay to "anchor" it. Cut holes for the ribbon with a craft knife, or use a hole punch, making sure everything still lines up.


Photobucket7. Thread the ribbon through the holes and tie into a neat bow on the front. Cut the ends if necessary; if they show, cut them diagonally for a nice finish.

Sunday, May 4, 2008

Tips & Techniques: Simple Weddings

Most people probably assume that "simple" weddings are easy weddings. Not necessarily! For one thing, what does "simple" really mean? Are we talking about the ceremony? The reception? The theme? The expense? The answer to that question really changes the outcome of the planning process.

When I say "simple" I mean a short, basic ceremony with a streamlined, no-frills reception. These are great for older couples that don't want a lot of fuss, second (or third or fourth) marriages, or couples that just don't want to deal with all the hassle a "normal" wedding can cause. That being said, it doesn't have to be boring or feel "cheap."

Boring weddings are usually also impersonal. They don't connect the guests to the couple and often just feel like going through the motions. What you want for your guests is that they feel you are honored by their presence (hence the wording on the invitations). It's best that everyone feels like they were chosen for good reason - not just another name to tick off the list and add to the gifts. That's where personalized wedding favors - even small, inexpensive ones - can really help you. Explain the things that mean something - even if that's just by getting the best man to grab the mic for a couple minutes. Little touches are often the most important.

"Cheap" weddings are the ones where the guests feel like they are more of a burden to you than a welcome face. It's especially insulting if you obviously spent a lot of money in other areas and decided to spend as little as possible per guest. You can save a lot of money by reducing the amount you spend per person, but do it in a way that still makes it feel special. That's where handmade or otherwise personalized items really work. If you still can't afford the amount you're spending, rethink the guest list: maybe it's better to celebrate your union in a nice way with a few people than to make it bare-bones with a larger number.

If you decide you want a simple wedding, think carefully about what traditions are most important to you. If you couldn't care less about the bouquet toss, don't do it! If you don't want a fancy dinner, pass around some hors d'oeuvres. Streamline everything so it goes smoothly without a lot of distractions.
Secondly, think carefully about your guest list (even without considering the budget). Simple weddings work well for very small, intimate gatherings; your guests can focus on you, not the "stuff" - and because of the small size, you can reciprocate the attention. Larger receptions might feel a bit naked, but this can be fixed by creating the right atmosphere. An interesting, but not busy, location is perfect for a simple wedding.

Bottom line: Simple weddings beg for intimacy and streamlining. Don't go for cheap - go for special.